
Bluebell version in self striping yarn. Size small. 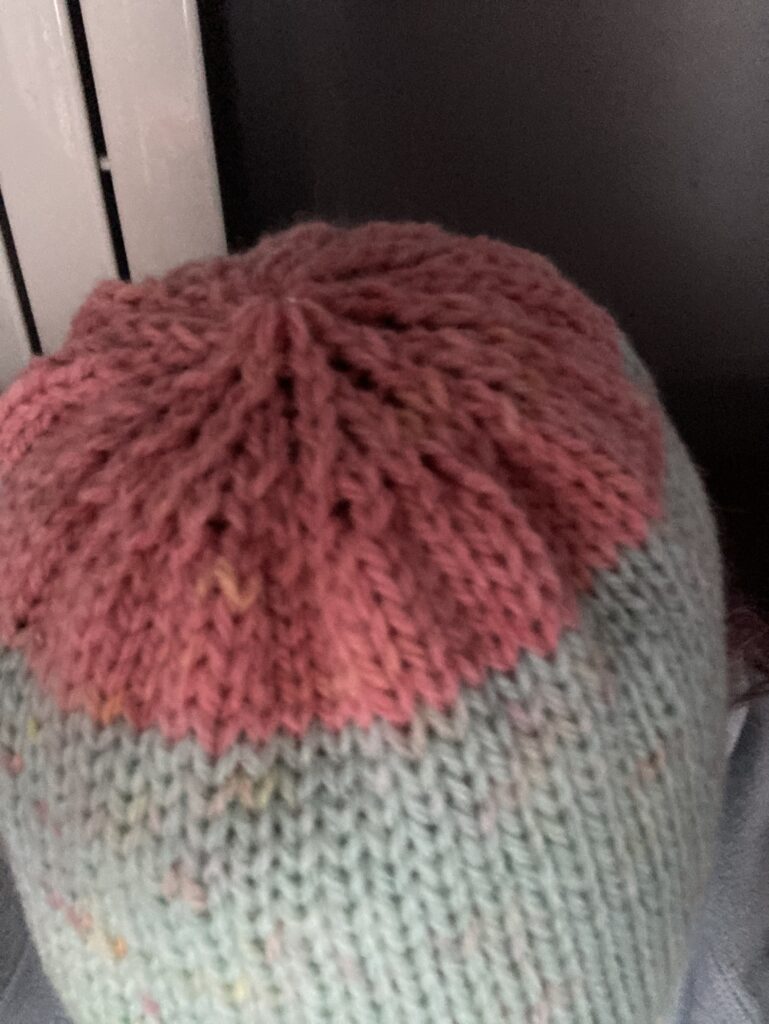
Neater style hat crown 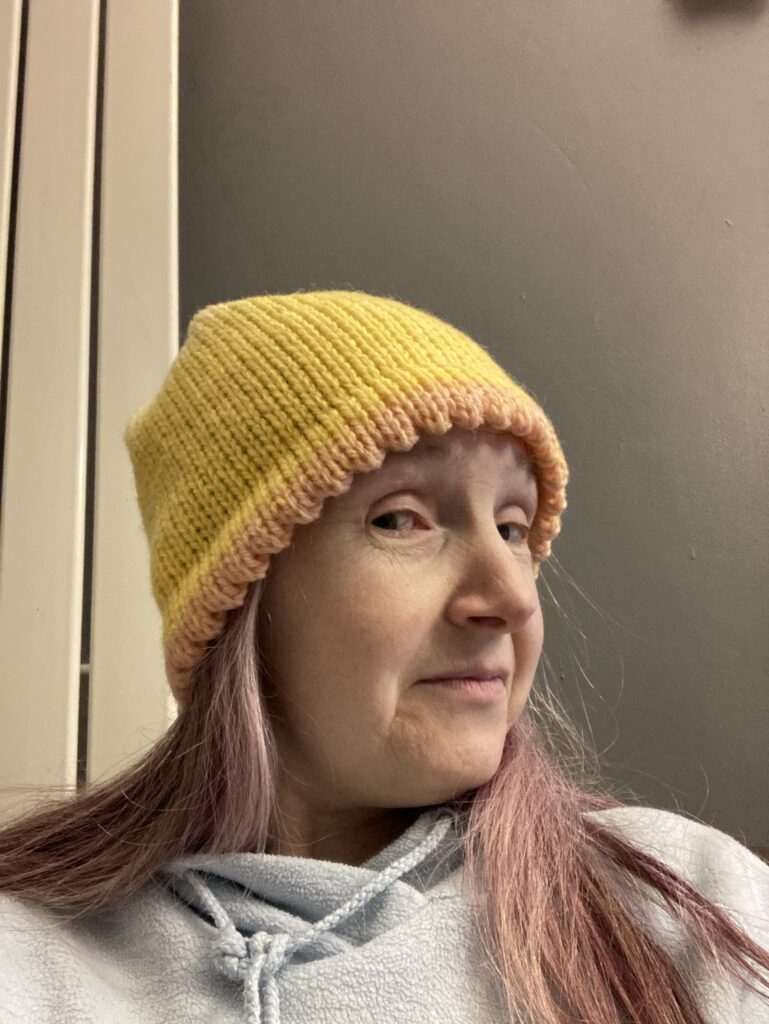
Sunflower version knitted in the same self-striping yarn. Size medium.
Inspired by the spring flowers I was seeing during lockdown I designed my own hat pattern as I didn’t have a pattern matching the tension of the yarn I inteded to knit with. I took advantage of the self striping yarn I had left over from another project to create the contrasting coloured hem and flower like different coloured crown section. I thought the picot edge would also be petal like so that was my inspiration. The yellow hat was knitted at a standard size but since I like hats to be a bit tigher on my head I made a smaller version too.
There were a couple of reasons why I knitted these hats; the first one being that because I was giving one of my Zippy90 knitting machines to a friend and I was going to lsalso teach her how to use the knitting machine online as I couldn’t teach face to face during lockdown. The video clips were originally filmed just for this reason so I explain the basics to get her started. I’ve edited the original video I made so the newer version is now on my public GlowsCrafts YouTube channel.
The video contains the information on how to hand transfer stitches for a picot edge and the methods I use to make the perfect flat folded hem on a knitting machine. This is often one of the things as a machine knitter we can struggle with especially at the beginning. The video contains explanations and shows how too’s rather than me knitting the full hat in real time. https://youtu.be/Q2HXaIemJR8
The second reason why I decided to knit hats to use as a teaching tool was that due to my FND (Functional Neurological Disorder) I have a sensitivity to cold on one side of my head and also my ear. Cold temperatures and also even a gentle breeze can cause me to be in pain so it helps if I wear a hat. Two layered hats in the winter and in the summer on a day out with a gentle breeze I can get away with just wearing a wide knitted headband as it’s the area around my ear that is most sensitive. It’s handy being a knitter….
I have been lucky enough to be taught how to use a knitting machine by my mum in the 80’s and then years later also the ladies who shared their skills in the knitting groups I used to go to. One of the techniques I am sharing with you today is something that I learned through the Centra Machine Knitting courses I did years ago and some I already knew. My aim going forward is to pass on the knowlage and skills I have learned over many many years so it won’t be lost. I will always include tips in my patterns.
Please bare with me as I do this as my FND effects my word recall and this means I have to edit LOTS out of the videos I make and why I may speak slowly at times. This blog post has taken weeks to do and edit but I think it’s ready for me to share it now. I am really nervous about sharing this blog instructional long length pattern!
It’s been a long time since I designed clothing and knitwear but I have the experience, skills and knowlage to do this as well as teaching craft experience as part of the volunteer work I used to do. It’s been a dream of mine for a long time to teach machine knitting to empower others and even make videos (there are just a few videos on my YouTube at the moment) but there wasn’t a demand for this until recently. If you wish to join me on this journey then please follow my GlowsCrafts YouTube channel and Instagram account to keep up to date with new videos/patterns/ tutorials/blog posts. Please note I do other crafts not just machine knitting and when possible I sometimes combine different crafts together in one project.
This adult hat pattern below is suitable for a 9mm guage knitting machine. I knitted on my Zippy 90 (LK100). The pattern also suitable for LK150 and possibly a Bond too. This pattern is written for the beginner machine knitter in mind so I have also added to this blog post how to do 2 versions of an open end cast on to cover the different types of knitting machines out there especially the vintage ones which I have a few of.
Open end cast on instructions
Method for open ended cast on for the LK100/150: Bring forward to B (working) possition a total of 75 needles then starting at the 2nd needle place alternate stitches back into A (non working) possition. Knit one row then bring the empty needles back to working possition and knit another row. Put your cast on comb on and add weights to both sides underneath the edge of you knitting and move every couple of inches while knitting.
Metal bed knitting machines: use a ‘weaving’ cast on by bringing a total of 75 needlles to B possition. Using a 1×1 needle pusher ruller, starting with the first edge stitch place alternate needles to holding position (HP) IMPORTANT: both end stitches need to be in HP! Select your HP lever/switch on your carriage and also engage your 2 weaving brushes on the main carriage. Set the stitch dial to your main tension. and check that all the needle latches are open. It is much easer to do all this before the next part!
Insert yarn into carriage then holding the end of the yarn lay over your needles in HP with the end of the yarn being held at the opposit end of the needle bed as your carriage allowing extra yarn as your knitting machine will ‘eat’ this strand of yarn as you knit. Holding onto the end of the yarn; knit the row slowly while gently holding the yarn end as it will move through your fingers!
The next part of this technique is to insert your cast on comb over the cast on stitches. Now you can bring the needles that are in WP into holding position so now all the needles your going to be knitting your hat with are in HP. Un-select your HP lever/switch so that your machine will knit the next row of stitches which are currently in HP normally. Next dis-engage the weaving brushes and continue knitting normally. Add a weight on each side of the cast on comb underneath the edge of your knitting and move every couple of inches when knitting.
TIP: The Weaving cast on method can also be used to make an automatic drawstring effect ie if your knitting a 3D object such as a toy or a drawn in edged scarf. Using this technique to create a draw string effect can save you a lot of time especially if your doing a lot of knitting!
GlowsCrafts Blooming Hat Pattern, Instructions and video.
Gloria wearing her Picot edge flower inspired hat in her own pattern. Sunflower version knitted in self-striping yarn. Size medium. 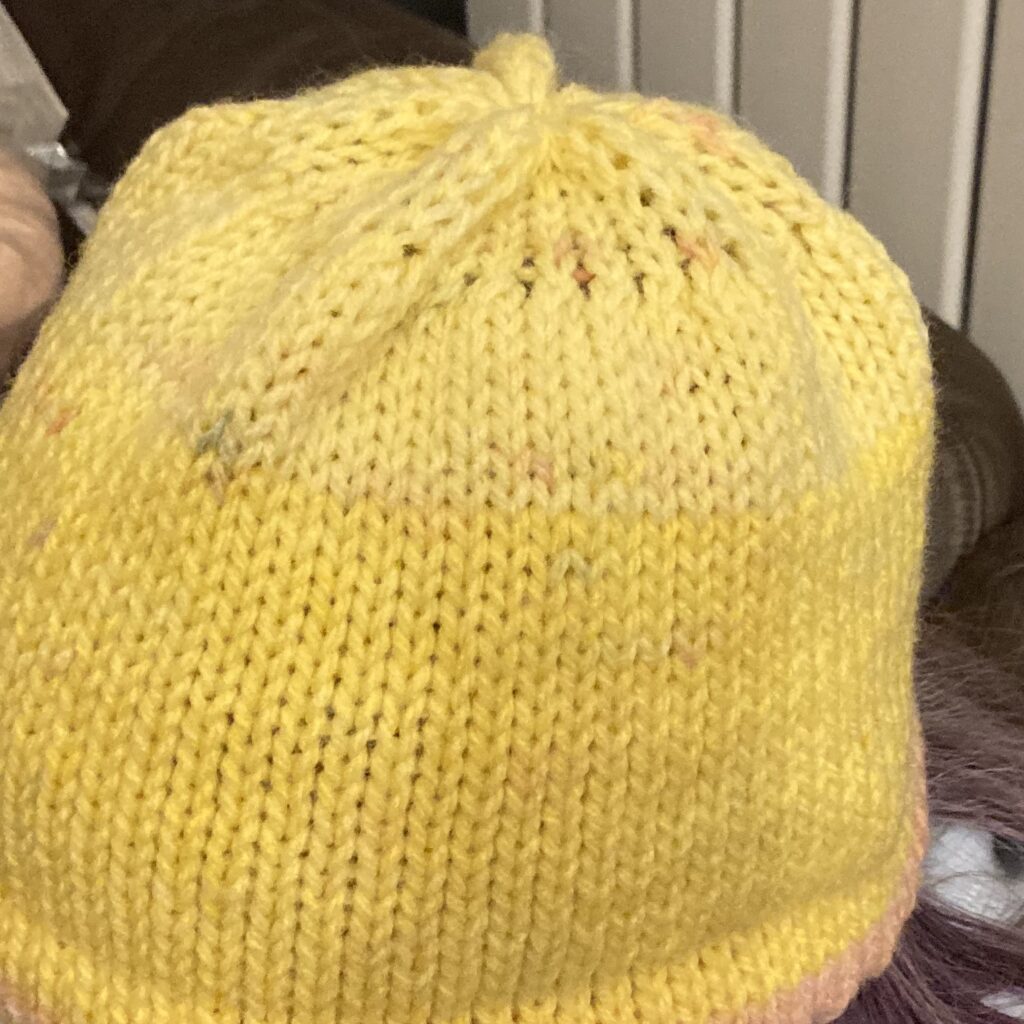
Crown shaped using the tension dial with alternating needles in non working position.
Yarn: 100g of a fine chunky yarn self striping yarn. Knitted in: So Crafty (Aldi brand), Knit & Purl Ombre yarn. Colour: Sundance. (classed as a medium yarn, no. 4. Recommended needle size 5mm. 200g ball yardage: 350m). Finished hat weighs 50g (This pattern is also suitable for using up your left over different coloured yarns from other projects.)
A ravel cord and a small amount of a finer coloured 4ply yarn to match the main colour of your hat. Small amount of a contrasting colour yarn for waste yarn.
TENSION: 15 stitches and 20 rows to 10cm/4″. Zippy90/LK100 MT 5
Finished size: Small adult 20″/Medium 21″diamater and both sizes 8″ in length
Cast on 71 stitches for size small/ 75 sts for size medium adult: using an open ended cast on using main tension (MT) and waste yarn (WY)
Place cast on comb onto your stitches if not already done so and knit at least 8 rows in (WY) ending with carriage on left (COL). Knit 1 row in MT using a ravel cord or strong crochet cotton. Reset row counter (RC) to 000 and carriage is on the right (COR).
Using main tension minus one (MT -1) for the inner part of the picot hem, knit one row in a similar colour of 4ply yarn. Remove the 4 ply yarn from your carriage and cut the yarn leaving enough of a tail end of yarn so you can sew this in when your hat is finished. Next thread the carriage with your main yarn (MY) and knit 4 more rows. RC005 (COL).
This one row of finer yarn will help decrease the bulk at the join of your hem. Knitting less rows on the inside and also in a tighter tension helps your hem lay flat. This method can be used for any guage of knitting machine as long as the 1st row of your knitted hem is knitted in a much finer yarn or even thread if your using a 4ply or finer yarn on a standard gauge machine. (The method I use is : Chunky gauge = 1 row less and Standard gauge =2 rows less)
Continuing in MY knit one row at main tension plus 1 (MT +1). This will be the fold row of your picot hem. Knitting this row at one whole tension higher than your MT means you will have a flatter more defined folded edge. This turning row method is also suitable for a flat hem/mock rib not just a picot edged hem.
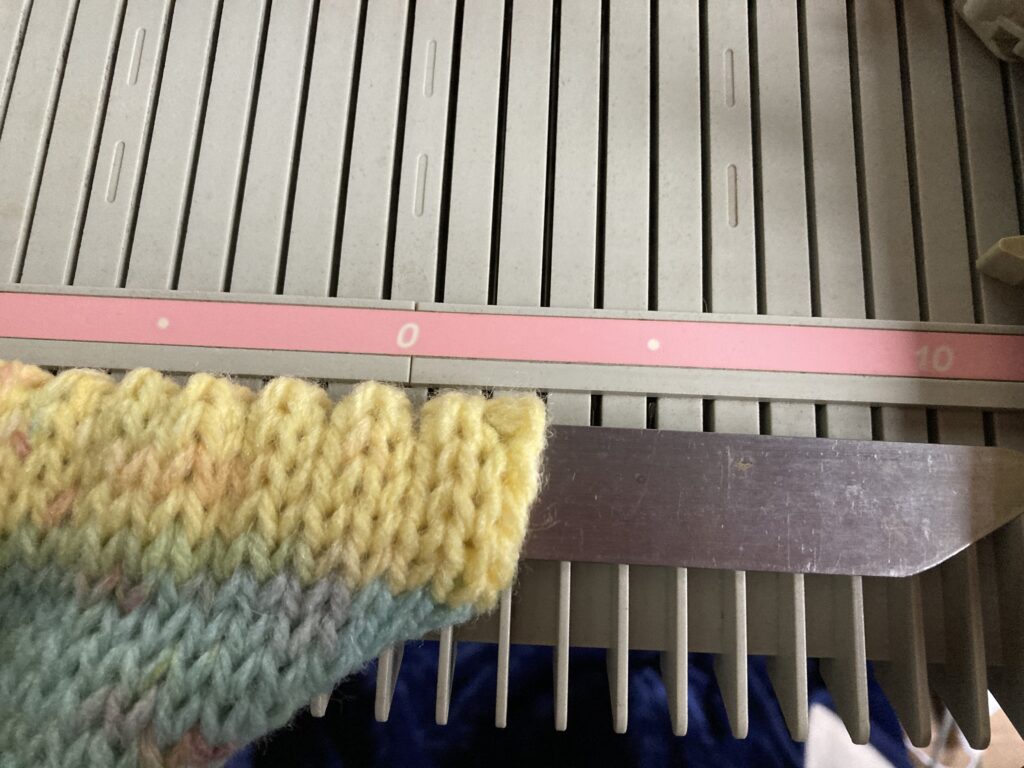
Using a single pronged transfer tool transfer every alternative (alt) stitch to the right starting with the 2nd needle on the left of your knitting. This lace hand transfer method will create the picot edge once your hem is folded.
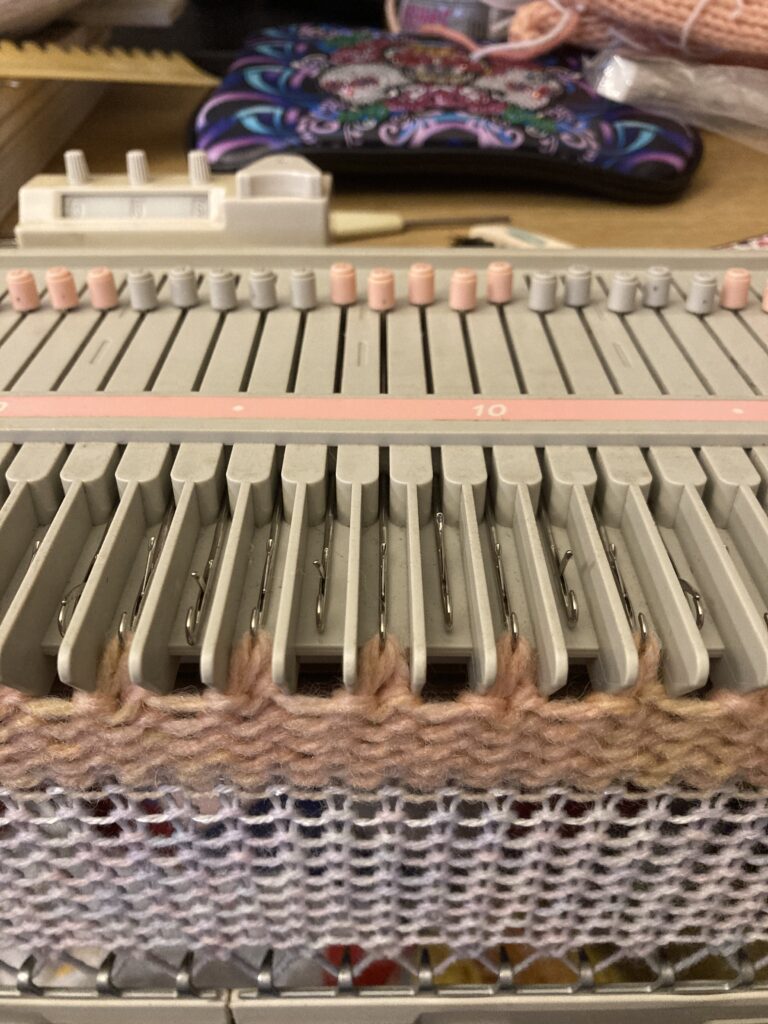
Use your ruller to straighten the needle butts (rollers for LK’s) before you continue to knit; keeping all the empty needles you were using still in working position (WP). TIP: to make this next row easier for your machine to knit you can put your needles out into holding position without engaging the HP levers so the row knits back normally.
With the Zippy90/LK100/Bond knitting machines you will need to move the needles in HP back to upper working possition ‘C’ ensuring your stitches don’t go over the latches and that the latches are still open. Use your transfer tool to open any closed latches)
Change tension dial (TD) to your MT and knit 6 rows. RC012 COR
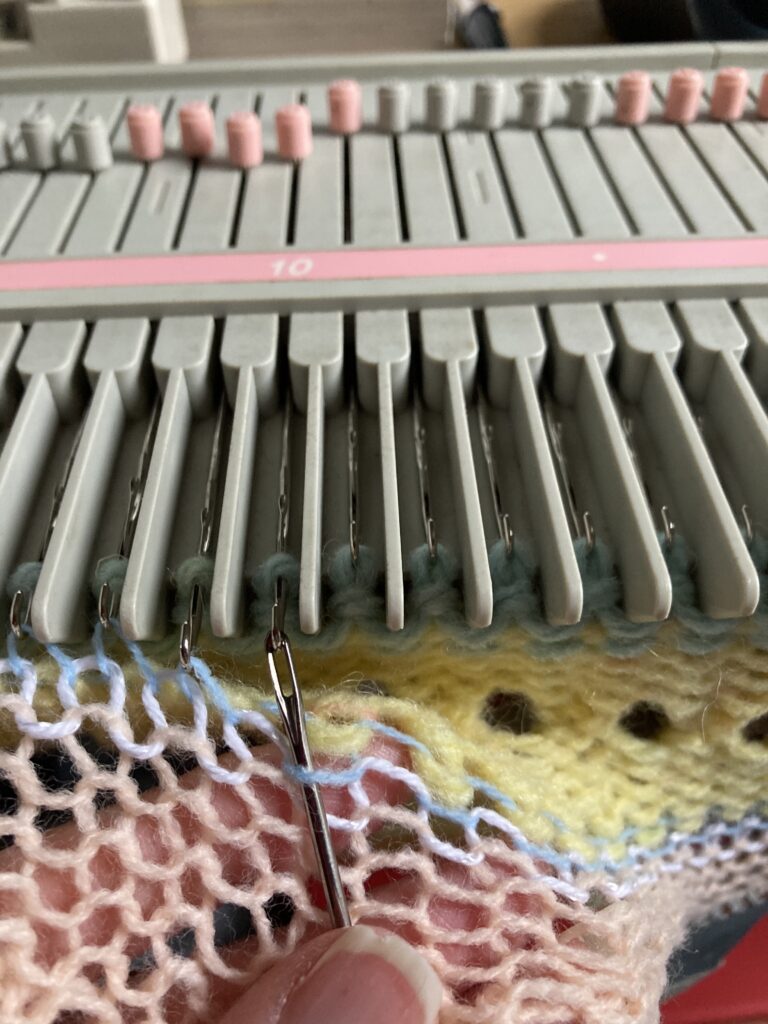
Joining your picot hem: Remove the cast on comb from the WY and pick up the first row of the hem which is in the finer yarn. Note there is always one less stitch to pick up so you’ll have to miss one needle out. I usually miss out the 2nd needle at the end placing my last stitch on the end needle on the right. (If you haven’t already watched my Picot hem Bloomin Hat video I recommend watching it as I demonstrate how to hold your knitting to ensure picking up stitches is easier.)
Reset row counter to zero (RC000) Change colour of your main yarn now if your yarn is not self striping or your using left over yarns.
To make the next row knit easier again on your knitting machine which also puts less stress on the needles: Using your ruller to bring working needles to ‘D’ which is holding position (HP). Ensure your carriage is set to knit rather than holding the needles. (Zippy90/Bond machines: Bring working needles out to HP and using your ruller push them back carefully to upper working possition ‘C’ ensuring your stitches don’t go over the latches and that the latches are still open. Use your transfer tool to open any closed latches)
Continuing to knit in MT replace your cast on comb using the above technique for your first row. Add a claw weight to both sides underneath the edge of your knitting. Move the weights up your knitting every eg. 10 rows to ensure the end stitches knit correctly and don’t fall off.
Knit till RC028 COR.
Shaping the crown method 1: Tension method (easy method ideal for beginners and is quick)

Transfer every 2nd stitch to the right maintaing only one stitch on each edge needle. Push empty needles to ‘A’ (NWP). Knit the next 6 rows for the crown of the hat as follows:
Knit 2 rows at MT -1
Knit 2 rows at MT -2
Knit 2 rows at MT -3 RC034 Cut your yarn leaving a long enough length for you to sew up your hat.
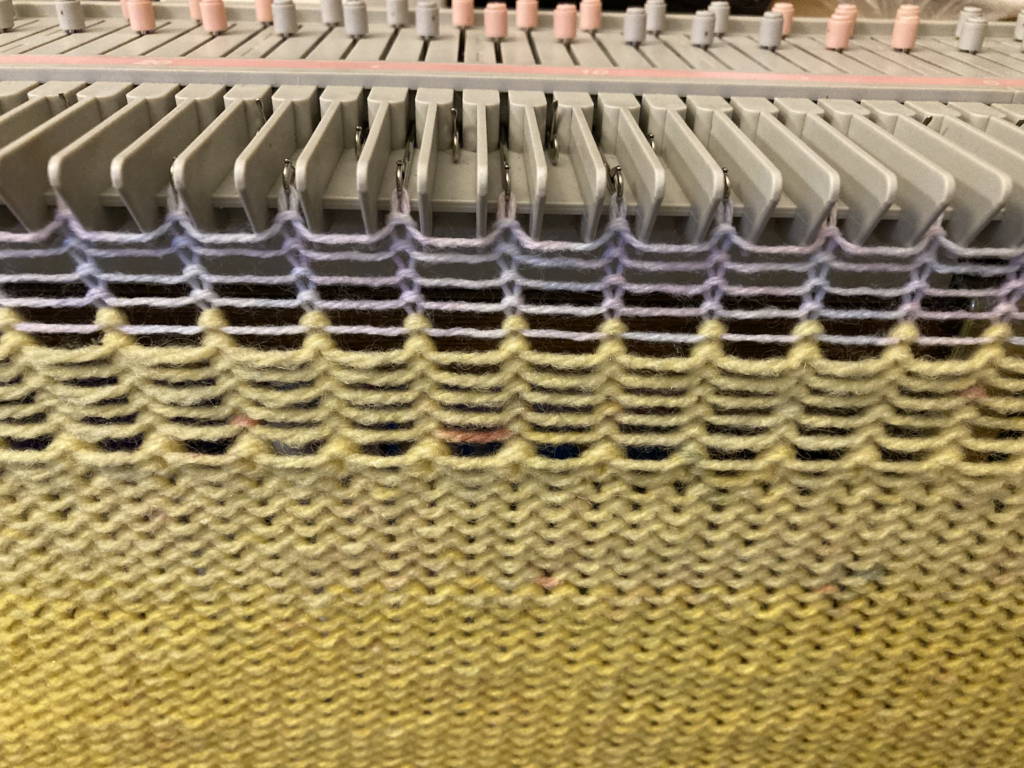
Removing your hat from needle bed method 1: Knit a minimum of 8 rows in waste yarn (WY) scrap off method where you knit in WY then remove by taking carriage across the needle bed with no yarn in it. Tug the crown of your hat gently so the yarn between the stitches closes up and the crown stitches become larger. This is why the tension was decreased as the crown is knitted to compensate for this. Once you have threaded your yarn through all the stitches in thelast row of your hat then unravel the WY at the top of your hat. (See photo in removing stitches method at the end of the Advanced Shaping section below if your eyesight is good and you want to save time by not knitting this WY part!)
Shaping the crown method 2: Advanced Full Decrease method (not in video)
Photos of various stages of decreasing.
Advanced shaped hat crown 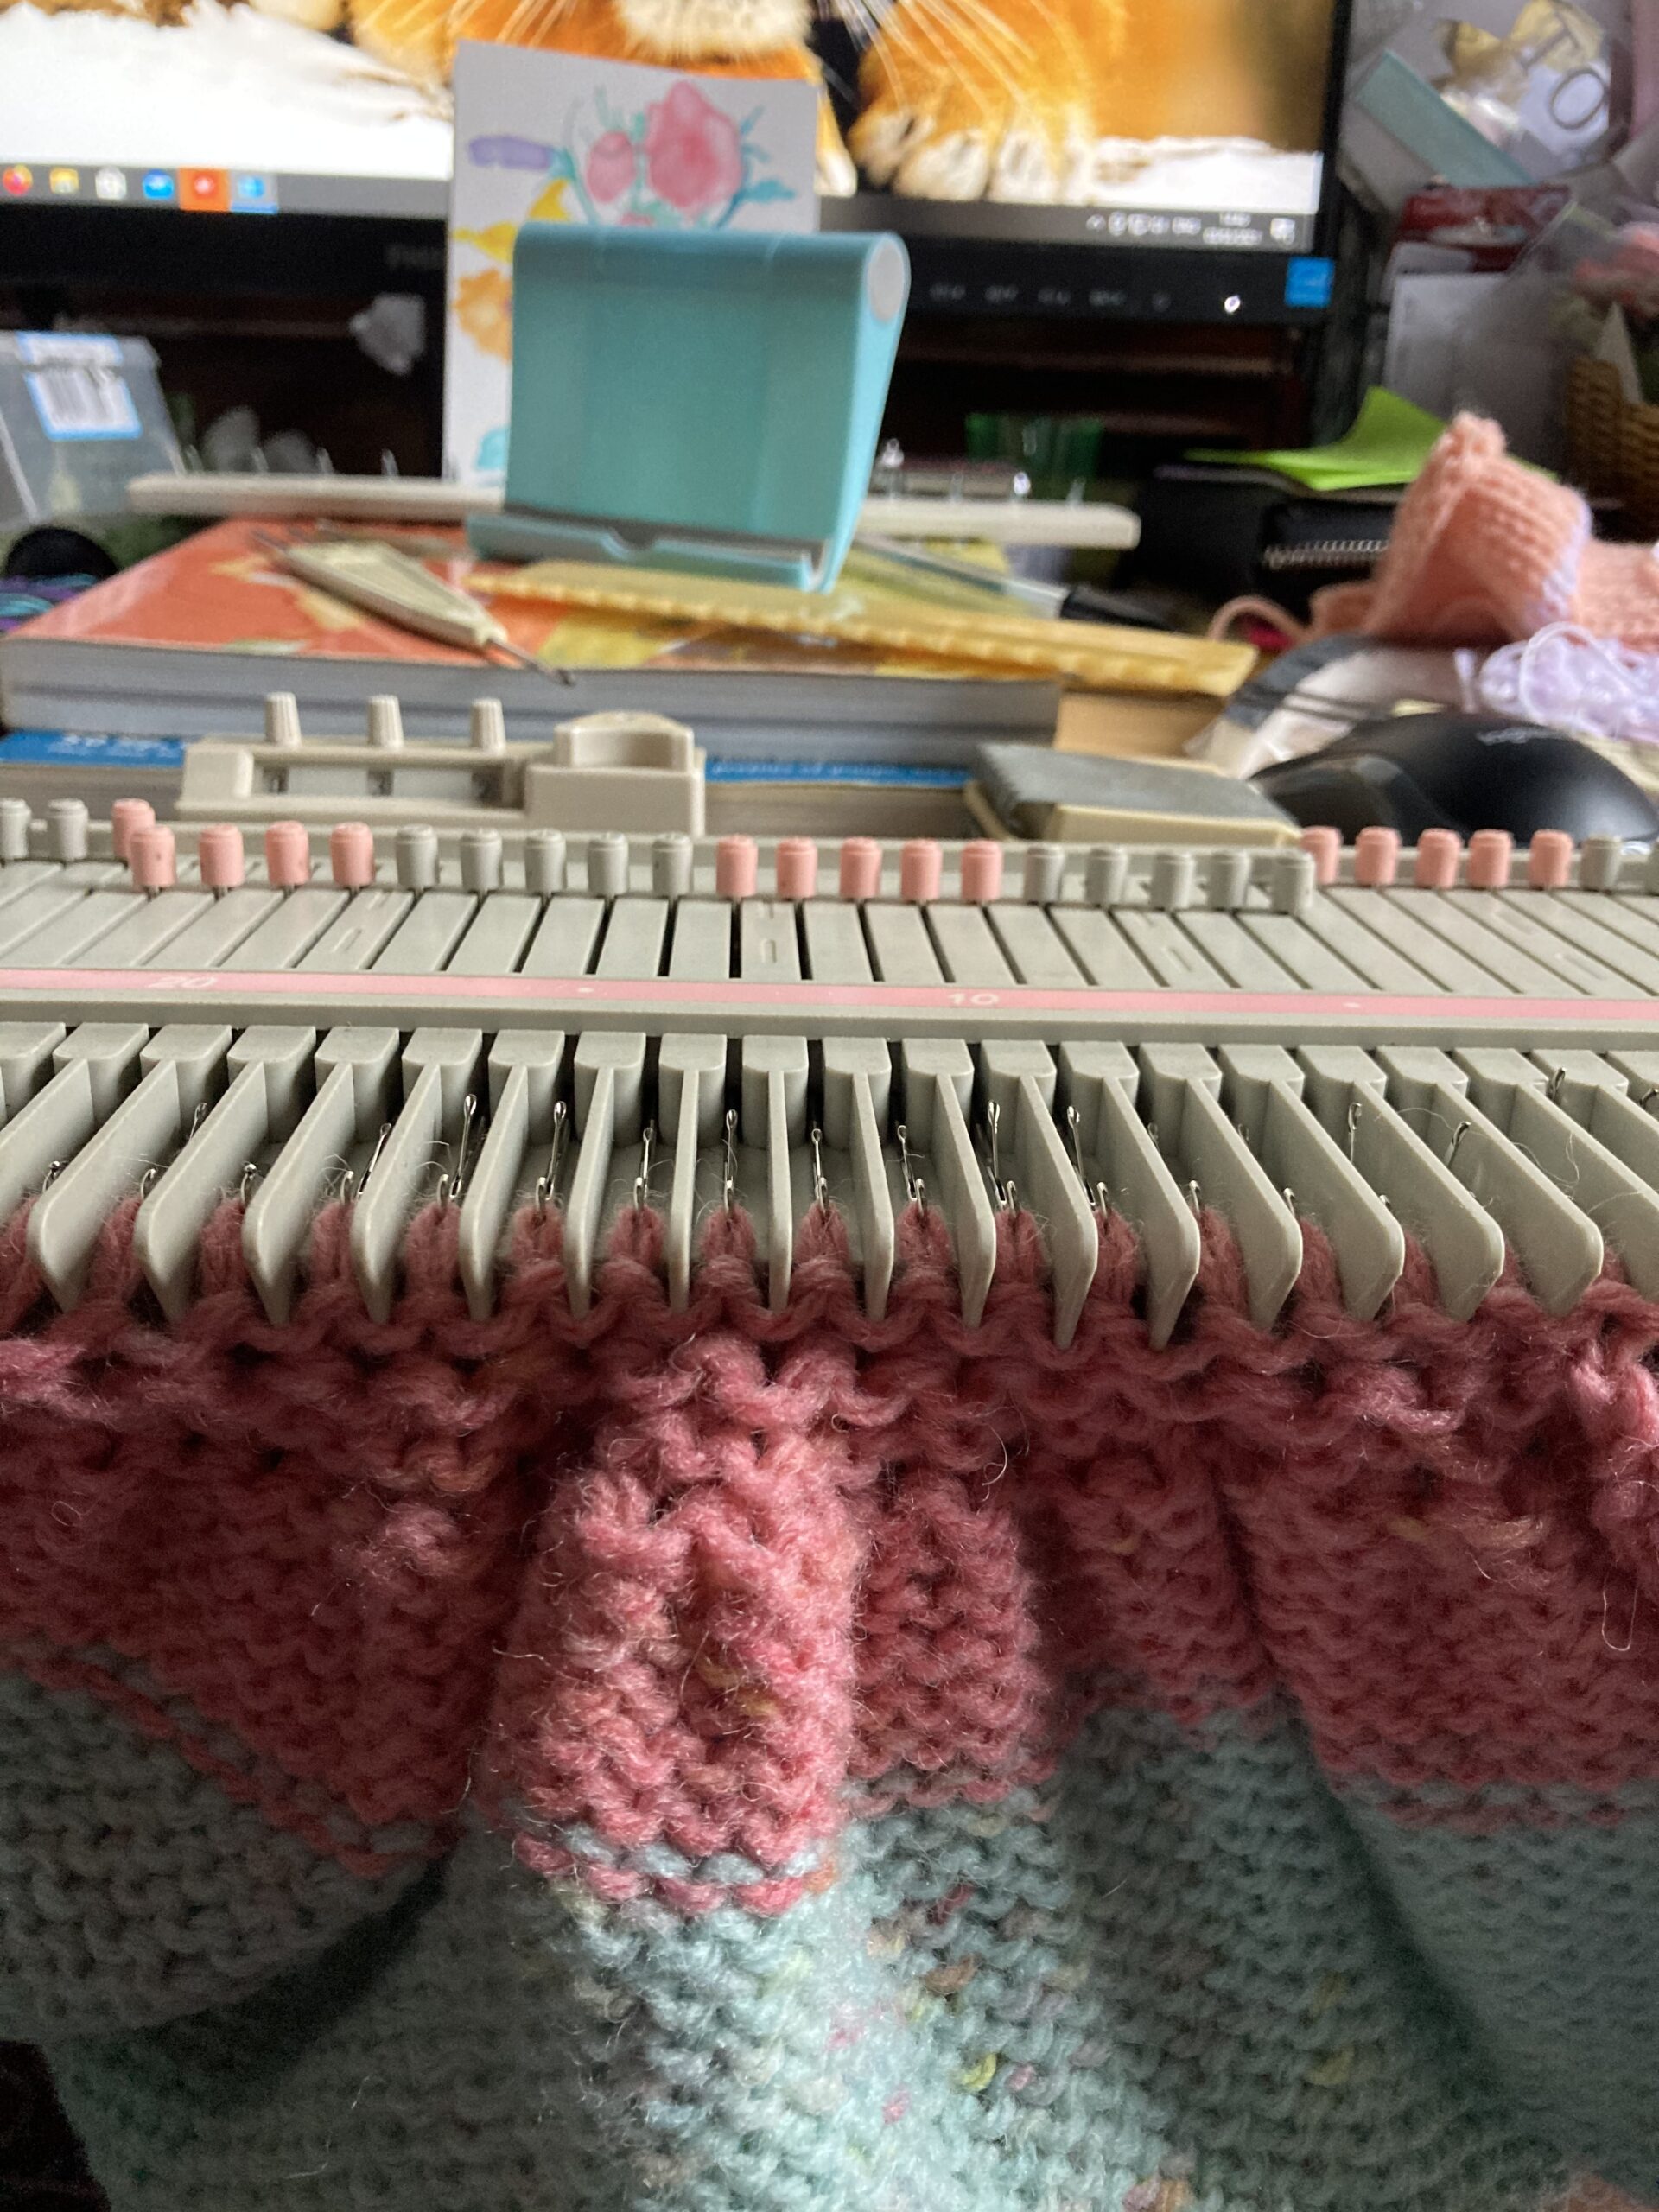
Decreased rows 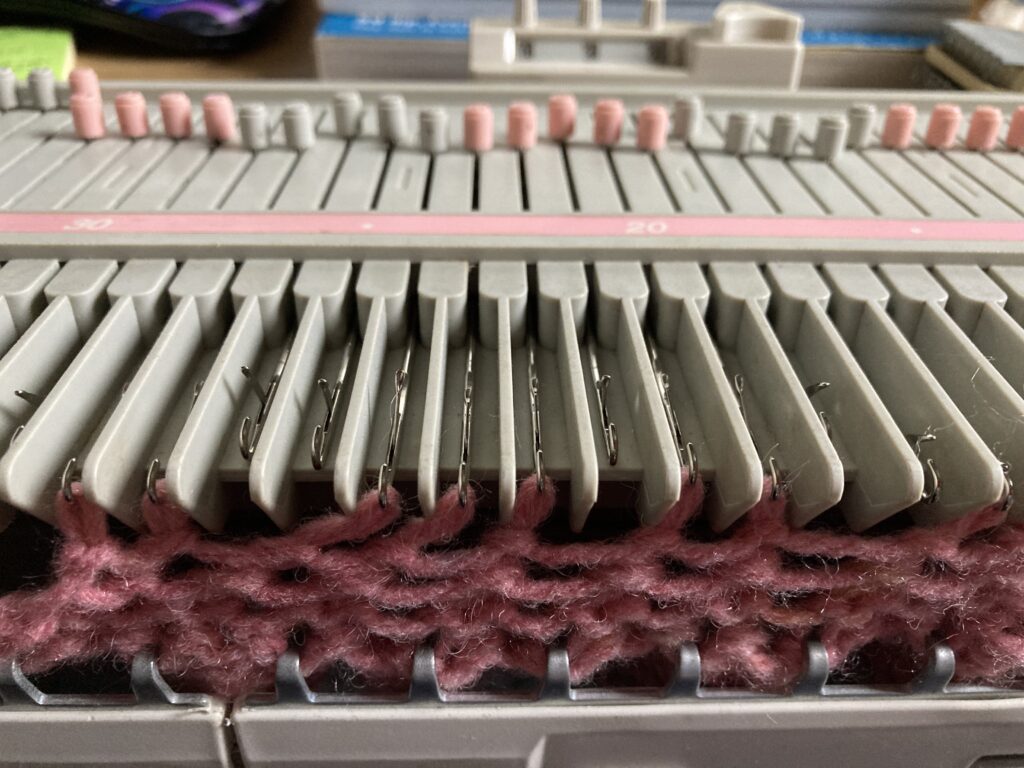
Moving stitches dec. towards center 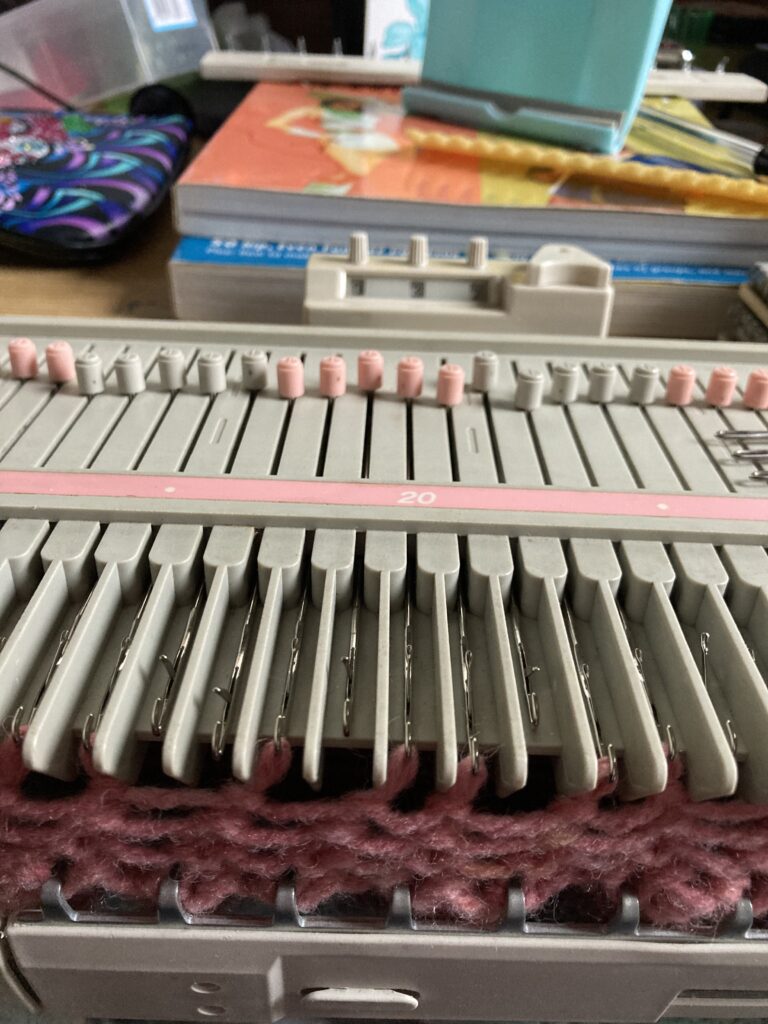
Moving stitches dec. towards center 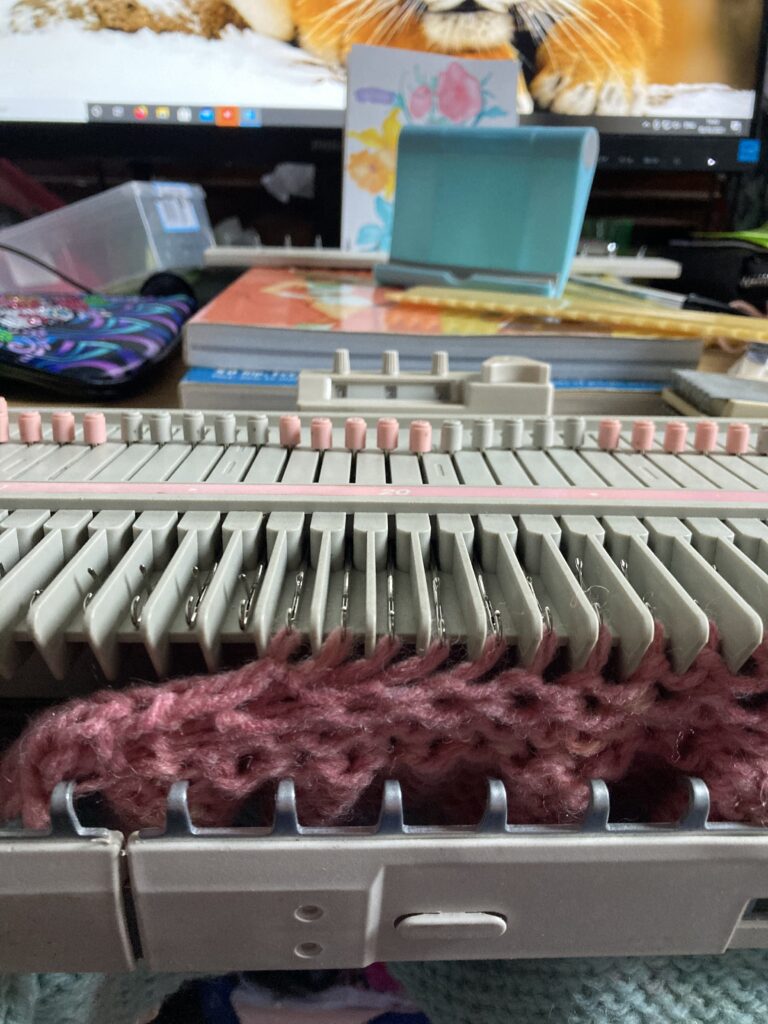
If required remove and replace comb for weighting down knitting.
Transfer every 2nd stitch as per method 1 placing the empty needles back to NWP.
Knit 2 rows at MT -1 then scrap off using WY knitting a minumum of 8 rows.
Pick up sts below waste yarn decrease (Dec.) stitches at the same time by placing 2 stitches on each needle working from the right of the needle bed to left only putting one stitch on each end needle. Place empty needes into NWP. Place cast on comb onto knitting a couple of rows down.
Knit 2 rows at MT -2 Remove cast on comb.
Since there are now less stitches to work with continue Dec. this time by moving the left hand side set of stitches first. Start at needle 2 (left off 0 on your number bar) and transfer to the right. Move each stitch along a bit at a time so you have 2 stitches on each needle apart from the end needles which will have 1 stitch. (this helps make sewing up easier). You will have to transfer the stitches towards the middle bit by bit using your transfer tools. Gaps of 2 needles are ok as you move the stitches inwards decreasing. Having 3 stitch gaps would put too much stress on your yarn and needles. Repeat with the stitches on the right hand side of the needle bed this time transfering from right to left. Remove your cast on comb now and use claw weights to weight the knitting down. Place all empty needes back to NWP.
Knit 2 rows at MT -3
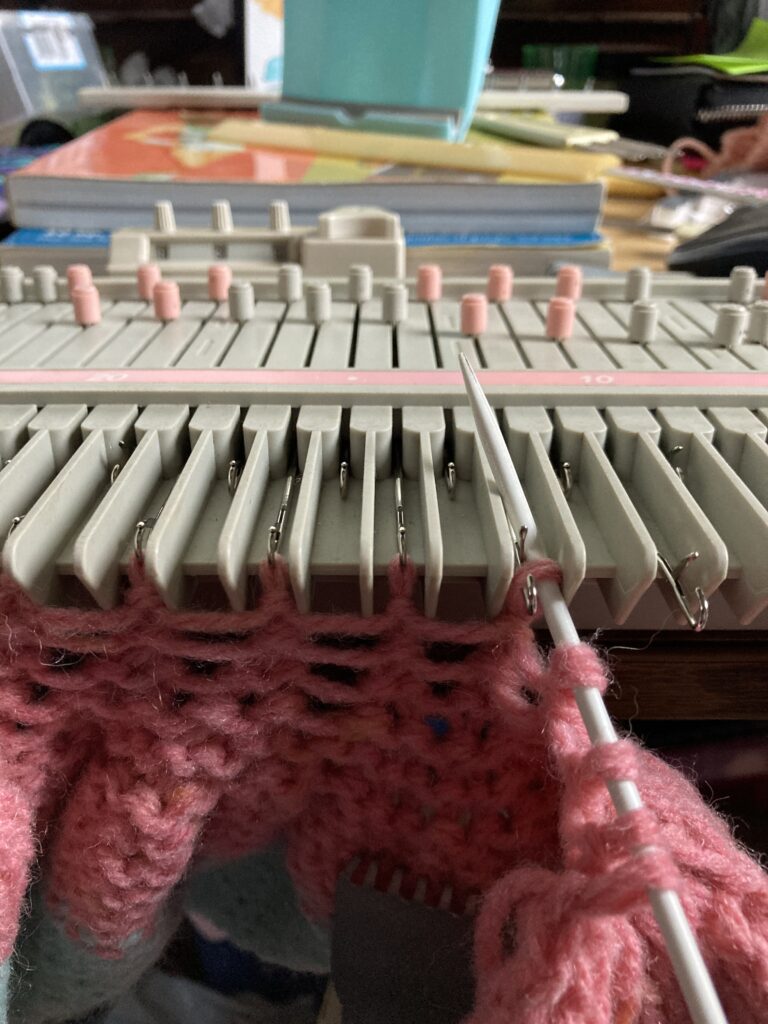
Removing your hat from the needle bed version 2: closing the crown: Cut your yarn leaving a long enough length for you to sew up your hat. Thread the end of yarn on a darning needle and starting at the end with the yarn end attached remove each stitch picking up onto your darning needle and pull through every few stitches. TIP: if you find it awkward when your learning to use your knitting machine to remove the stitches using this method there is another way. You can also remove the stitches with your darning needle moving the needle forward holding the needle butt/roller until the stitch goes behind the latch then move the needle back until the stitch falls over the now closed latch.
Note your RC will not be the same when using WY/scrap off crown method.
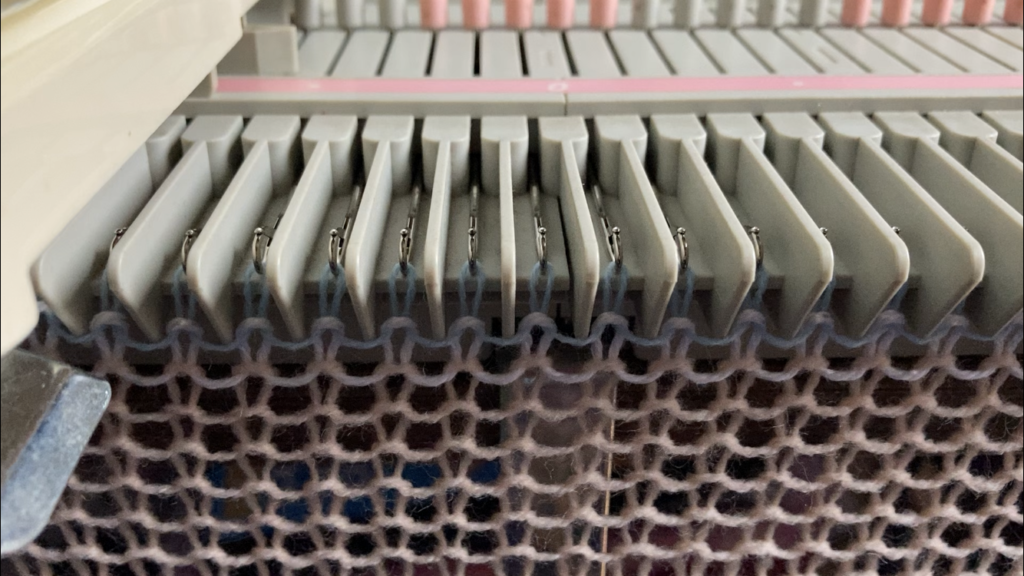
Setting the stitches on your picot edging hem. (Demonstrated in my Picot hem Bloomin hat video)
Before sewing up your hat remove the waste yarn from your picot edged hem by first unraveling the 1st and last stitch of your ravel cord. This will help you remove the ravel cord more easily as the end stitches can very easily get tight. Hold your hat at one edge in your hand and pull on the ravel cord a bit at a time to remove it. The scrap yarn will now be released and can be unraveled and re-used as waste yarn many many times! I don’t know who started the phrase ‘waste yarn’ but as machine knitters we really don’t waste it!
To set your picot edged hem place either a metal ruller or a knitting needle all the way along the inside of your hem. Pull down on your hem away from the edge to create a nice crisp fold line. The method used within this pattern and supporting video should ensure your hem lays nice and flat and does not ‘kick’ out the way.
Sew up your hat by securing the open stitches at the top by pulling the yarn tight to create a circle then do a few stitches to secure. With right side facing sew up your hat using matress stitch (see photo below) to create an almost invisable seam paying attention to ensure your coloured stripes match up. TIP: If the stripes don’t match note which side is lower down. Then unravel a few stitches and you can then compensate to match the stripes by putting your needle through one loop instead of two on the lower side. No one will ever nottice you have done this as mattress stitch is invisable so only you will know!
Pull hem downwards from the picot edge to create a nice crisp folded edge. 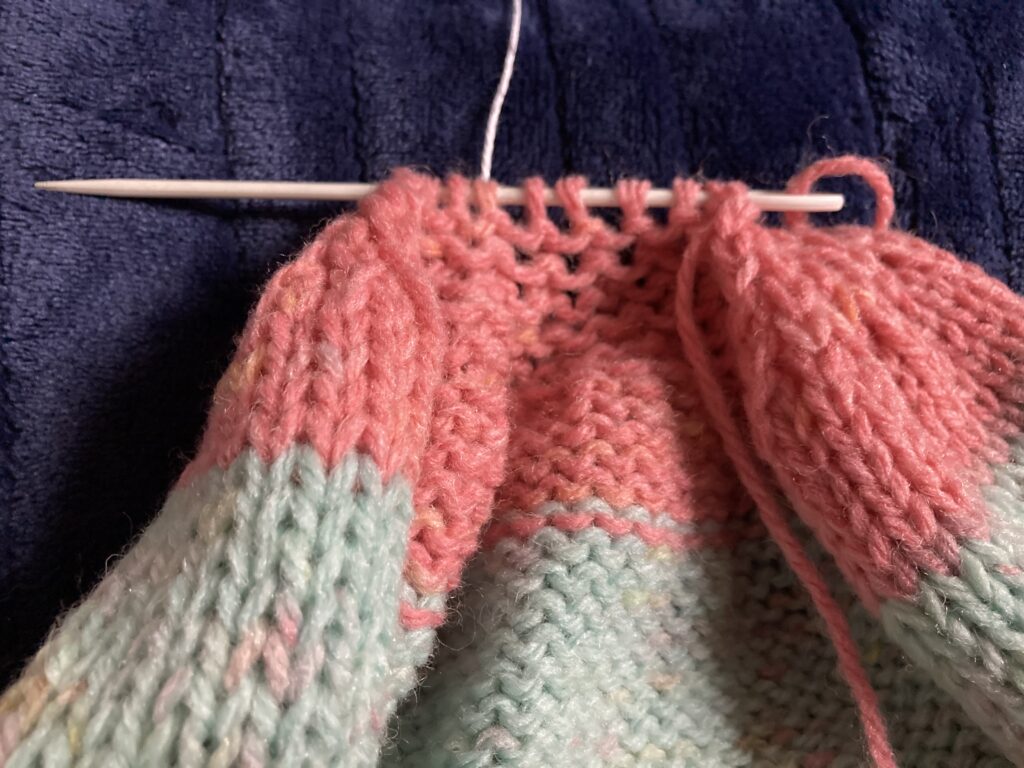
Put open stitches on a darning needle and thread yarn through pulling tight to create a circle. 
Mattress stitch picking up 2 loops at a time on alternative sides. 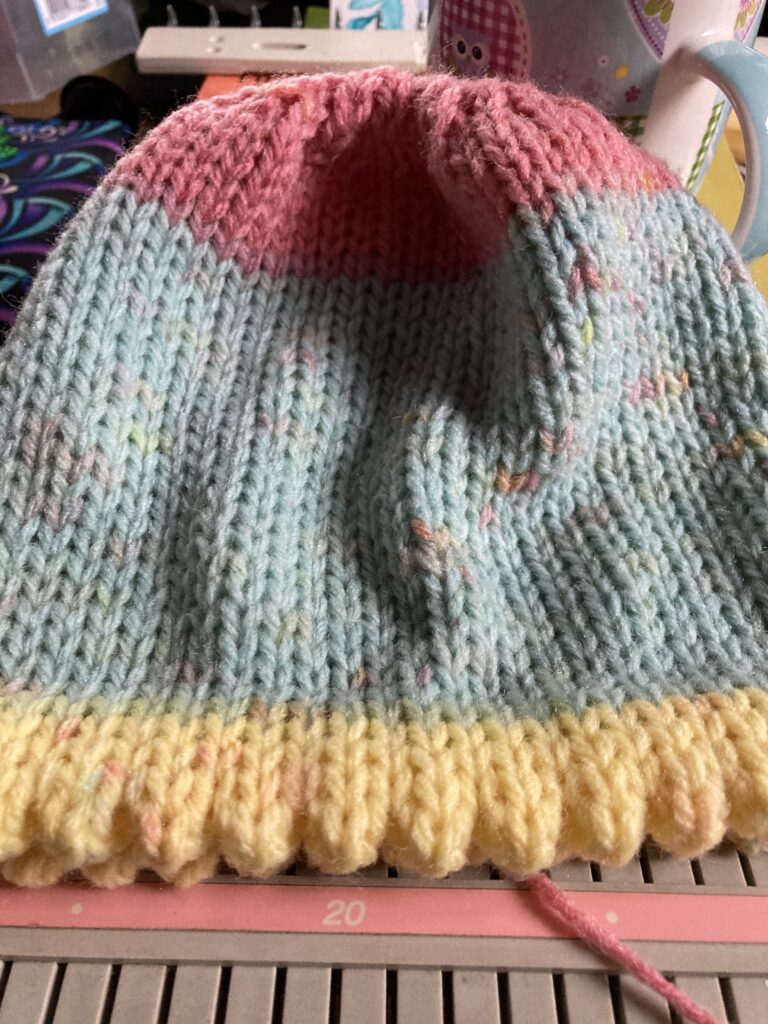
Hat has a nice flat hem 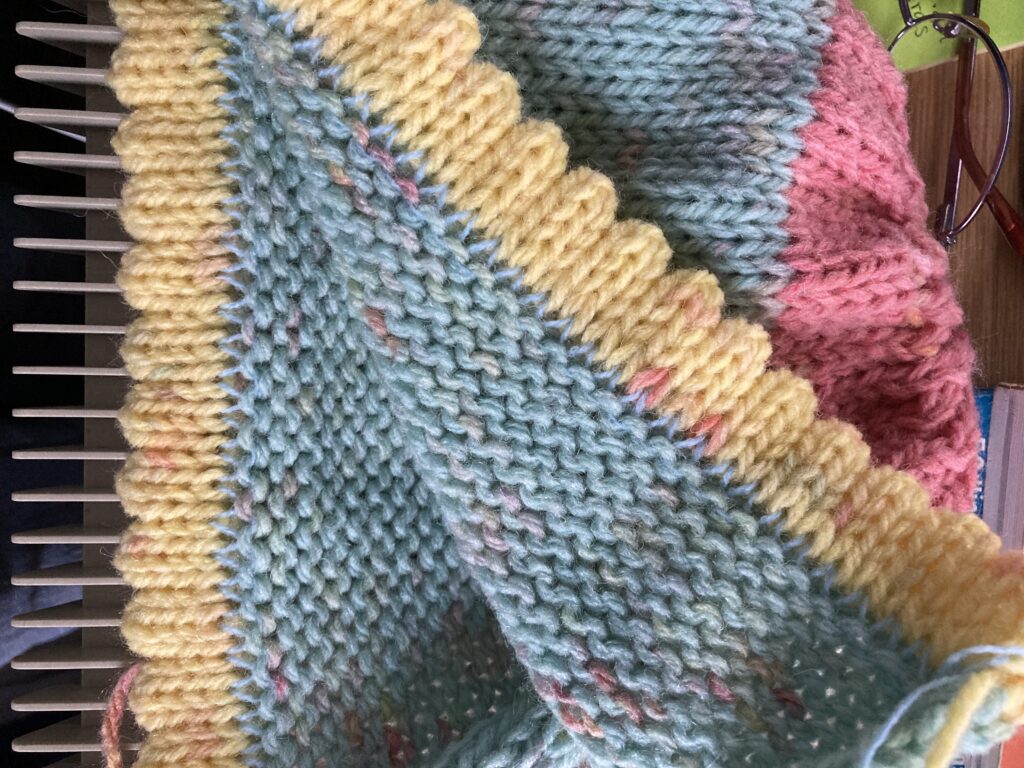
Thiner yarn method for a hem
©GlowsCrafts 2021
Angel policy: You may use this pattern to knit a hat for yourself and to sell the hats you knit at a non comercial level from your home/studio to sell at ie craft/virtual fairs, a shop on your website but not an auction site. Please state that the pattern is designed by GlowsCrafts.
This written instructional photographic tutorial pattern may not be printed/distributed fully or in parts via an electronic document or photocopied to be sold or given away freely. You are welcome to print off a personal copy for yourself only if required.
Please link back to this blog post or my social media (Instagram/youtube/FB page) using the hashtags #glowscrafts #bloominghatpattern if you knit this pattern as I would love to see your Blooming Flower colour scheme.
If you are in any doubts about the angel policy then please use the contact form on this website to ask any questions.